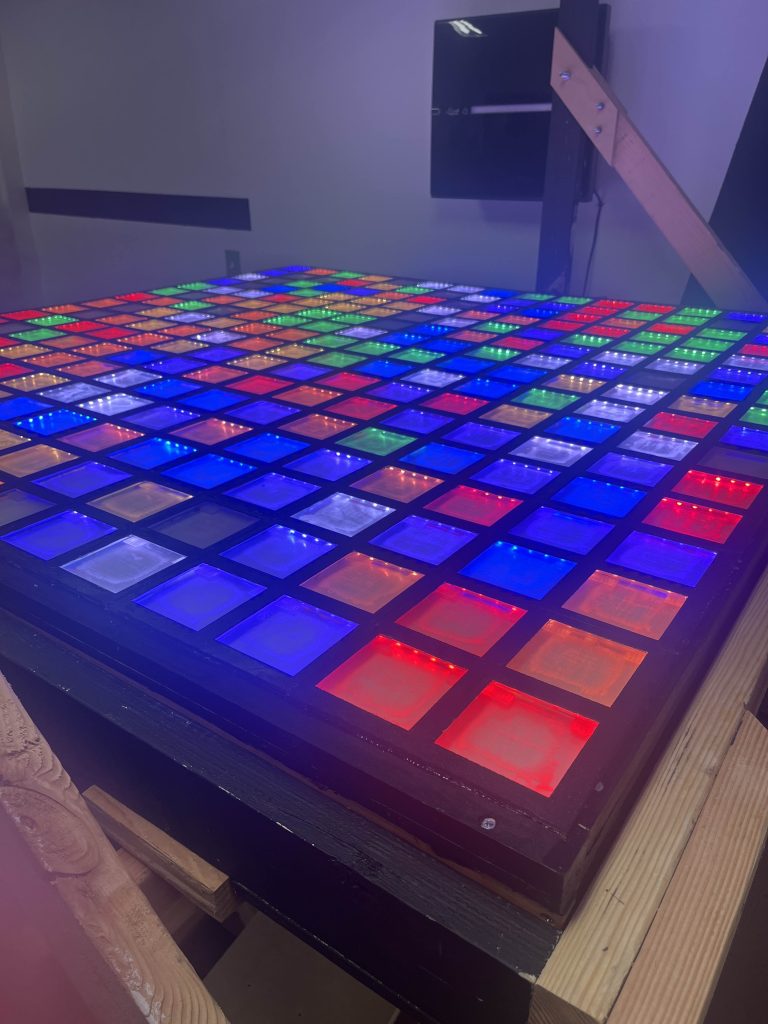
3D Printing the Lattice: Making Art for Napa Lighted Arts Part 3
Hello friends and welcome back to our mini series Making Art for Napa Lighted Arts. To recap, our award winning PF3000 is to be included in the 2026 Napa Lighted Arts Festival and we’ve been working through all kinds of cool engineering challenges in order to make the piece an exceptional experience. In part 1 we covered structural changes to the piece to withstand high winds and in part 2 we got down and nerdy with our new touch sensor design. Turns out we still have quite a bit more to talk about and with part 3 we will dive into how we used 3D printing to waterproof the front of the PF3000. As per usual, grab a hot cocoa, get comfortable and join me for a few minutes as we explore just what it takes to build big interactive art.
Other articles in this series:
- PF3000 v2’s New Frame: Making Art for Napa Lighted Arts Part 1
- PF3000 v2’s Touch Sensors: Making Art for Napa Lighted Arts Part 2
- Circuits and Power and Networks, Oh my: Making Art for Napa Lighted Arts Part 4
- Build Day: Making Art for Napa Lighted Arts Part 5
The Lattice Saga
Background
Needing to Waterproof the Display
Napa Lighted Arts is a month long arts festival that’s on the city streets of Napa, California between January and February. You know, outside, and in the winter at that. We’ve talked about this weather business in part 1 of this series, though part 1 was mostly about managing safety during high winds. Now we’re going to get into that other winter weather challenge, rain.
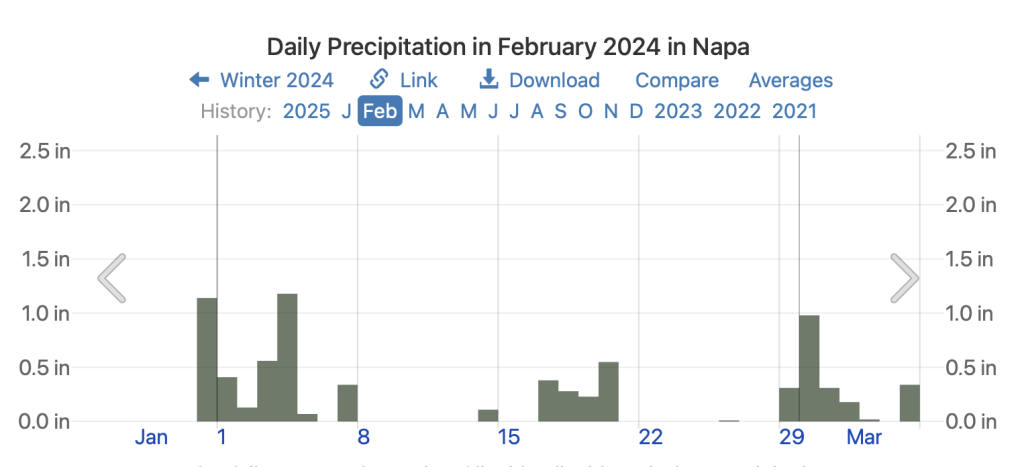
Since we have an interactive art piece that leverages electrical components like LEDs and little mini computers and such, we have to be really careful to ensure water doesn’t get inside our art piece. Should water get inside, well, that could irreparably damage components and then not so much interactivity would result. While we can make repairs on the street they will be extremely difficult to perform outside of our shop here in Berkeley. We have to do our best to make sure the wet weather ruin the show.
The Space between: Where the LEDs live
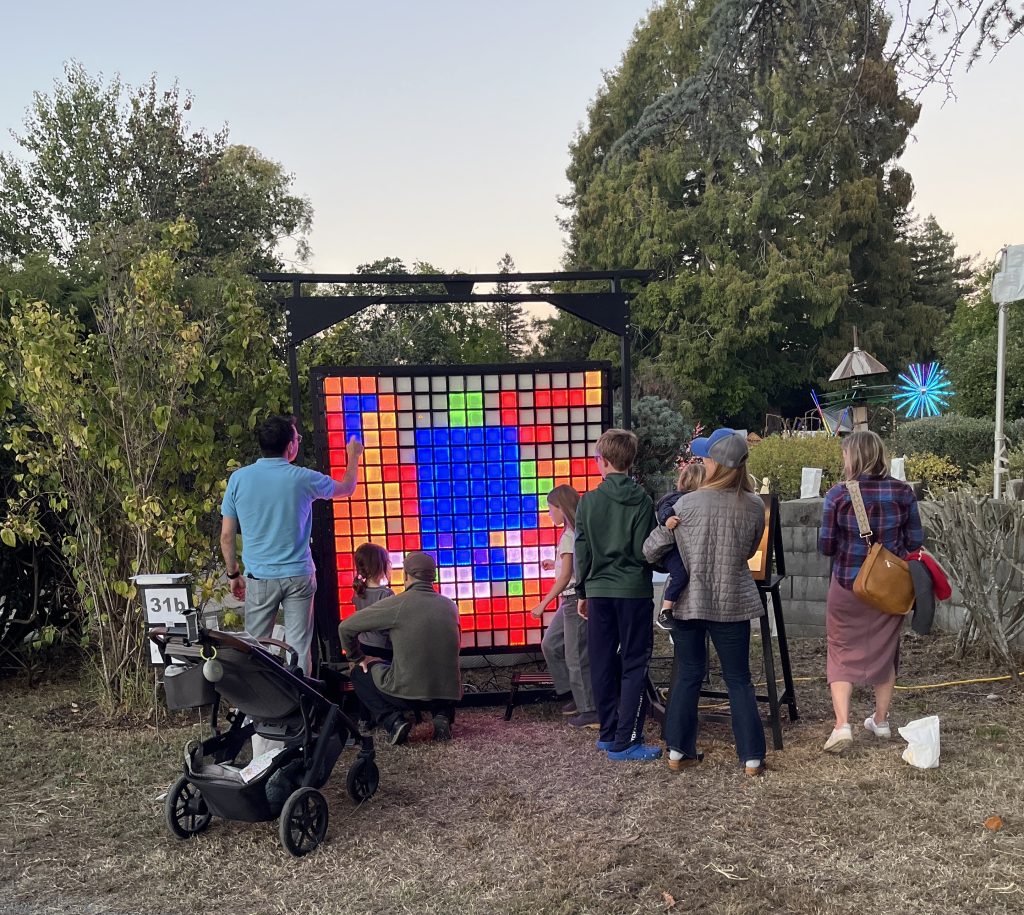
The PF3000 is, for all intents and purposes, a very low resolution (16×16 pixels) touch display. Think about it as though you zoomed way way way way (way) into your computer or phone or tv screen and we cut out a teeny tiny chunk of it then using super growth technology made that chunk 6’x6′ in size. The PF3000 display, much like your tv, has a front and a back to it and we need both sides to be waterproof. That said today we’re only talking about the front, as it was an exceptional challenge in its own right.
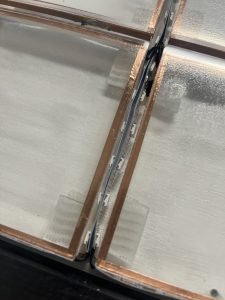
Each pixel is a 3.75″x3.75″ square. Between each of the squares is a small channel (like a canyon) where we seat the LEDs (aka lights) that make all the cool colors.
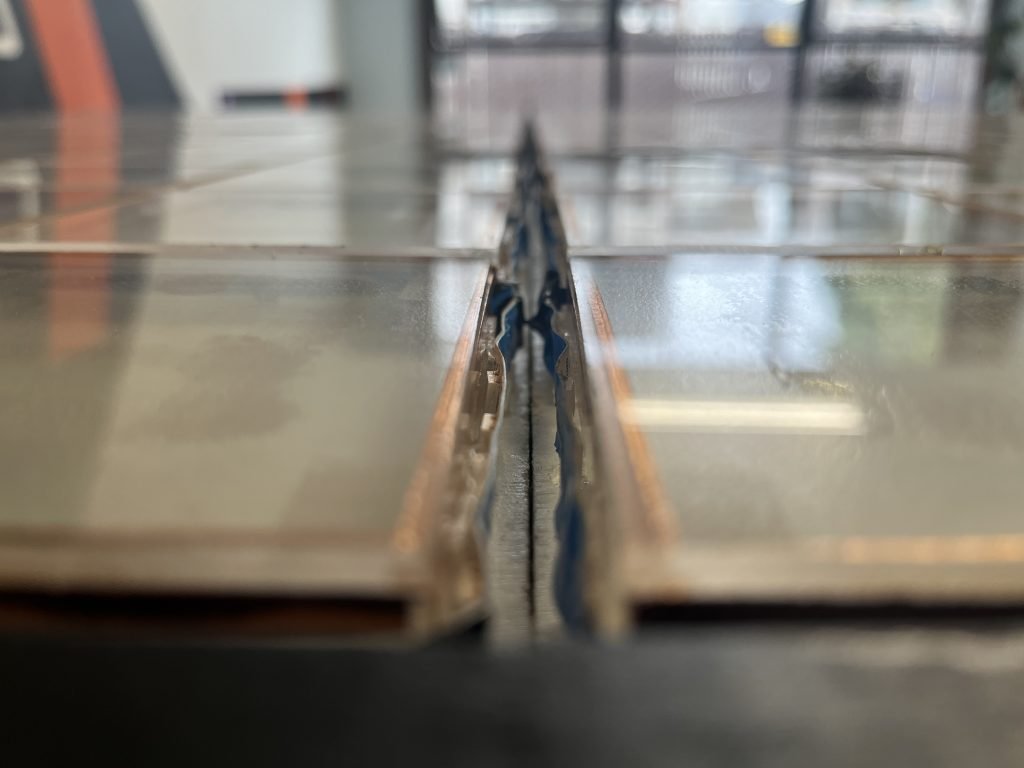
Without any covering for these channels there are three (okay four) problems:
- Aesthetics: the art piece looks like a science lab experiment and not quite an art piece.
- User experience: we want people to be able to slide their hands around to light up squares. If your hand catches the edge of a pixel it kinda sucks if i’m being honest
- Electronics are exposed to the elements. If it rains those LEDs are getting wet. If those LEDs get wet, well, that’s no bueno.
- Okay i said 3 problems but this is an extension of the third – water can get from the front of the display to the rear of the display and mess up the internals. This is also no bueno.
In the past we didn’t really have to worry about rain too much so we used electrical tape to cover the LED channels. It looks great, it is cheap, and you can slide your hand over it no problem. But this is the Napa Lighted Arts festival and we have new challenges. The PF3000 has to be outdoors for 30 days in the middle of winter and it has to survive no matter what the weather is. Electrical tape just isn’t going to hold up in those conditions. Electrical tape is really only good for a day or two then needs repair and it is definitely not going to stand up to a real winter storm.
And so knowing this we set out on a multi month long journey to figure out how to keep the water out.
Enter the Lattice
The structure we knew we needed to create just from years of life experience was a lattice. In the context of the PF3000 this just means we need a black grid we can place over our LED channels to keep the water out and make things look nice. Because we also want people to slide their hands around the PF3000’s display, the lattice also needs to be thin so it doesn’t catch fingers.
If you’re new the concept of a lattice, here’s the definition of lattice from the internet:
a structure consisting of strips of wood or metal crossed and fastened together with square or diamond-shaped spaces left between, used as a screen or fence or as a support for climbing plants.
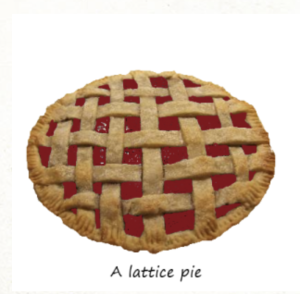
Lattices come in a bunch of forms though, on of my favorites being the lattice on the top of this pie (note how its just a criss-cross grid on the top):
Now the PF3000 is a custom engineered art piece, we’re not exactly going to find a lattice that will fit at the garden store. We’re going to need to create a lattice out of something, but what? And so way back in september we started digging pretty hard at this problem and it turned out to be a bit of an emotional roller coaster. Grab some popcorn, there are all kinds of twists and turns in this story.
The Shower Parts Lattice and the Internet Scam
Our first attempt was to see if we could build a lattice by repurposing already manufactured parts, kind of like what we did with the electrical tape. There’s all kinds of components that already exist that could probably be pretty easily turned into a lattice when the correct amount of imagination is applied. Think about it like we do for a second – what do we need to make a lattice? We need thin strips of black material that we can attach to the PF3000 display in a water tight way. We know thin black strips are used in all kinds of contexts, like floor trim for example, so if we can find the right material with the right dimensions, maybe we can just repurpose it. If only.
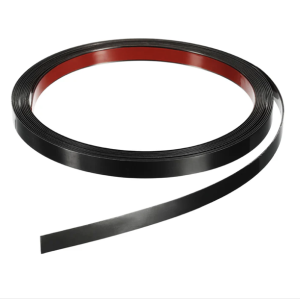
In order to see if an existing part will work we have to understand the needs of the lattice. Let’s break those down a little more:
- Thin – but how thin? About 1mm is as thick or less, or else it will catch the finger. An alternative to this could be a product with a gradient slope (meaning it starts out really thin, gets thicker, and then gets thinner again).
- Material – Back in part 2 we talked about our capacitive touch sensors. Not all materials are going to play nicely with capacitive touch. We’ll need something that does
- Black – gotta be black, this is an aesthetic choice we made.
- UV Resistant – the art is going to be outdoors for 30 days. Some materials can become brittle when left in the sun, this is something we need to prevent or else the sun could ruin the lattice and let the water in.
- Robust – Strong enough for excited children and adults alike to play with colored light
- Malleable – Something we could modify to suit the specific needs of the PF3000
Knowing this we set out on a quest (roll the D20!) to see what products we could find. We looked at hundreds of parts and most had one thing or another that just wasn’t going to work well for the PF3000. Eventually I found one component that seemed like it might work pretty well, a decorative shower door strip made out of PVC.
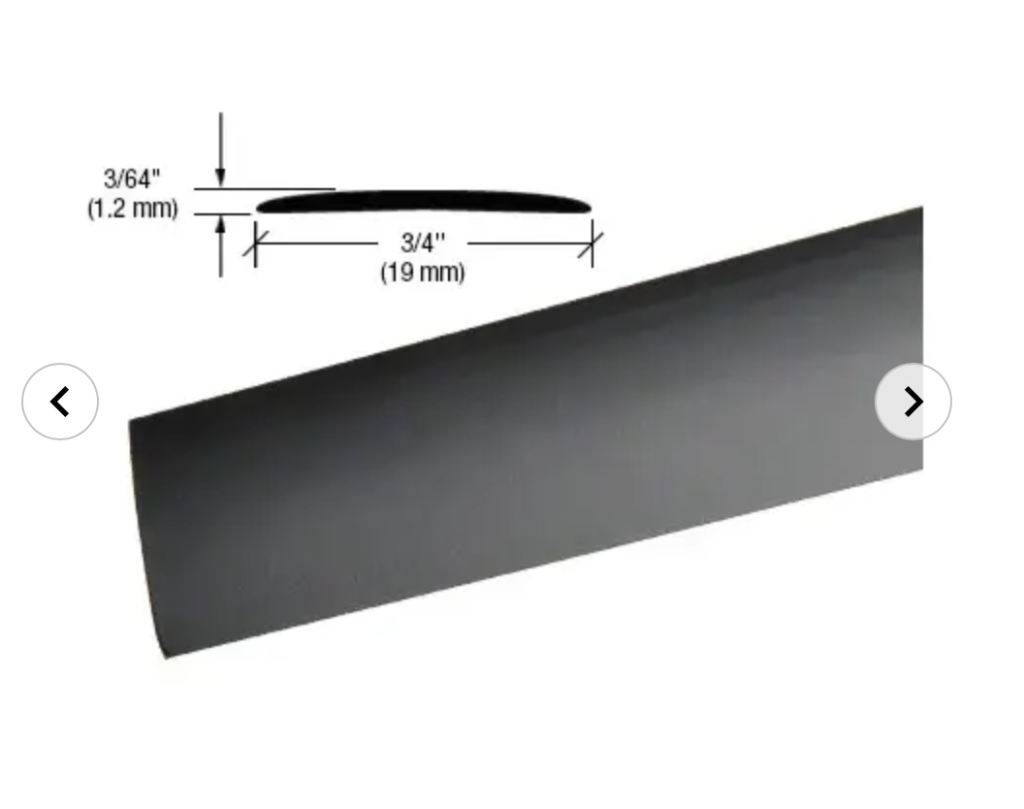
This particular component was designed to stick onto shower doors of all things. You like make little designs on your shower door with it. Now I know we’re not building a shower but this component checked all the right boxes. Thin, had a nice gradient for finger sliding, water proof, black, good material for capacitive touch lattices and uv resistant to boot. It checked all the boxes but one, the one box I failed to mention, that would be the budgetary box. This stuff is expensive. While we have some budget for the project, not nearly enough to purchase enough of this component to get the project done.
And so we did what most people would do, we googled the part number looking for a better deal. And a better deal we found, literally like 40% of the normal cost. So we bought the part. Easy enough… right? Right?
Uh, and then things got weird. Really weird. Literally the second after inserting the credit card information we were sent to some random website and were not sent a receipt. Then shortly there after we got shipping notices for packages that had already shipped. Uh, uhhhhhhhhhhh. Uhhhhhhhhhhhhhhhhhhhhh.. oh no.
Oh crap, we’d been scammed. Someone had used AI to scan bathroom stores and generate a fake store front to trick people out of their money by offering crazy good deals. Yep, that deal we found was just too good to be true and they got us. Thankfully we were able to stop the payment and get our money back, but we had to cancel the credit card and all that fun stuff. Yeesh, and all we wanted to do was make some art and share it with our community.
We thought about then just paying full price for the part but we were a bit nervous about more internet transactions with unfamiliar stores and the part was still crazy expensive. There was only one other store that seemed to have the part and well, it had some really dicey reviews. Eh, maybe its not worth it; maybe there’s a better way.
Making a Custom Lattice
We talked about things for a while after the scam. A bit shaken but not deterred, we had to come up with a way to make a lattice that will suffice for the Napa Lighted Arts festival. Given we practically live in a makerspace we’re well aware of 3d printing as a way to make custom parts, maybe there was a solution if we leveraged 3d printing technology?
First we called a 3d parts manufacturing expert to see if they could design and make the parts we need for the PF3000. Sadly they totally flaked on us after making us wait two weeks; literally just didn’t show up. Then we thought, maybe 3d printing is too much effort, maybe caulk? But nope, that ended up being a terrible idea, the caulk kind of catched your finger and just feels like your cleaning the bathroom. Time kept passing and our schedule was shrinking with no answer. 3D printing still seemed like a good option, but how to approach it. With our time window shrinking we had to start thinking fast.
One of our members had some experience doing 3d printing and thought, “heck, maybe I can figure out how to do this myself”. He didn’t have the single greatest printer known to human kind or all the experience in the world, but perhaps with a little experimenting we could at least figure out what direction to go. And so he got to work and came up with some initial designs. Check them out below.
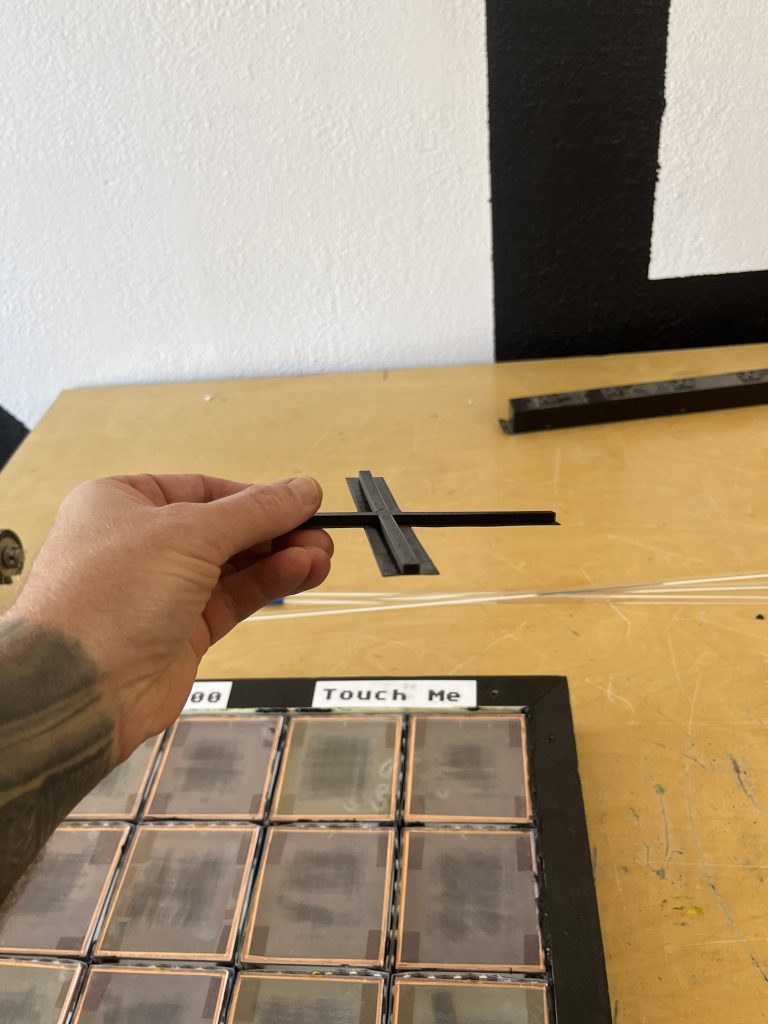
The first attempt was a little plus symbol type design. You could plop it down in the intersection of 4 pixels. We added depth to the design to help push the LEDs to the bottom of the channel. To evaluate we used our prototype unit which is a 4×4 grid of pixels instead of the full 16×16.
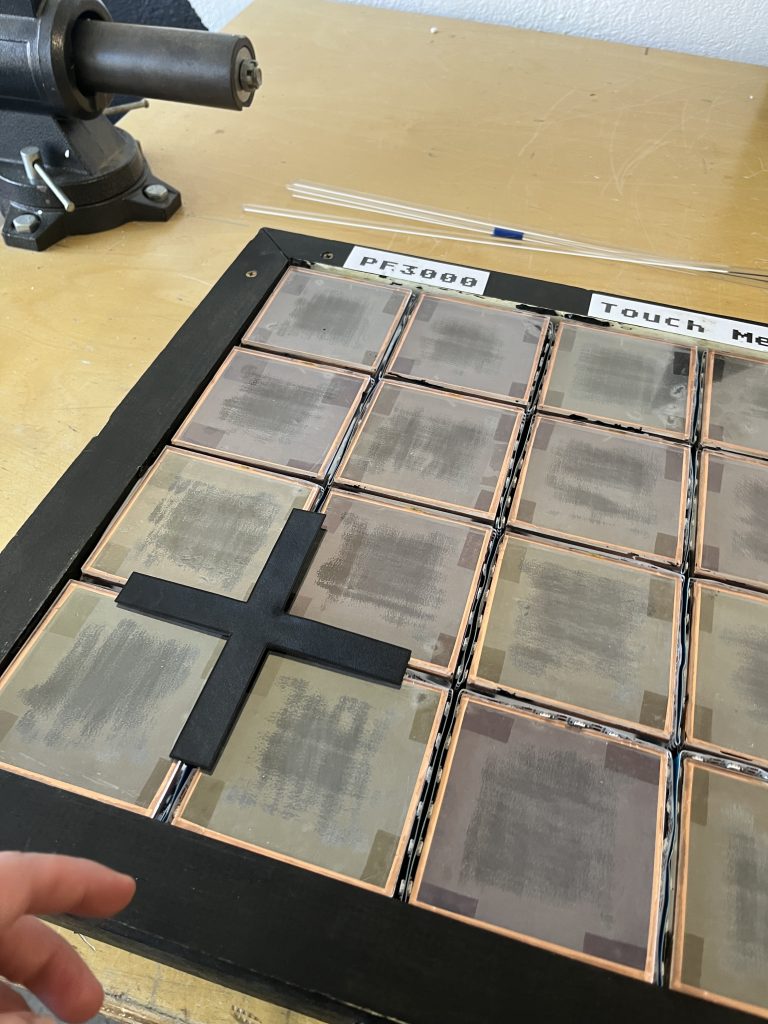
This was a pretty good start but it didn’t quite work. Among the issues we discovered there’s one you can see in the picture, it kinda makes it hard to deal with the outer perimeter of the display as you’d need to make a bunch of custom parts for the edge cases (see what i did there?). We didn’t fully decide not to use the + design at the time and but decided to keep experimenting to see if we came up with anything better.
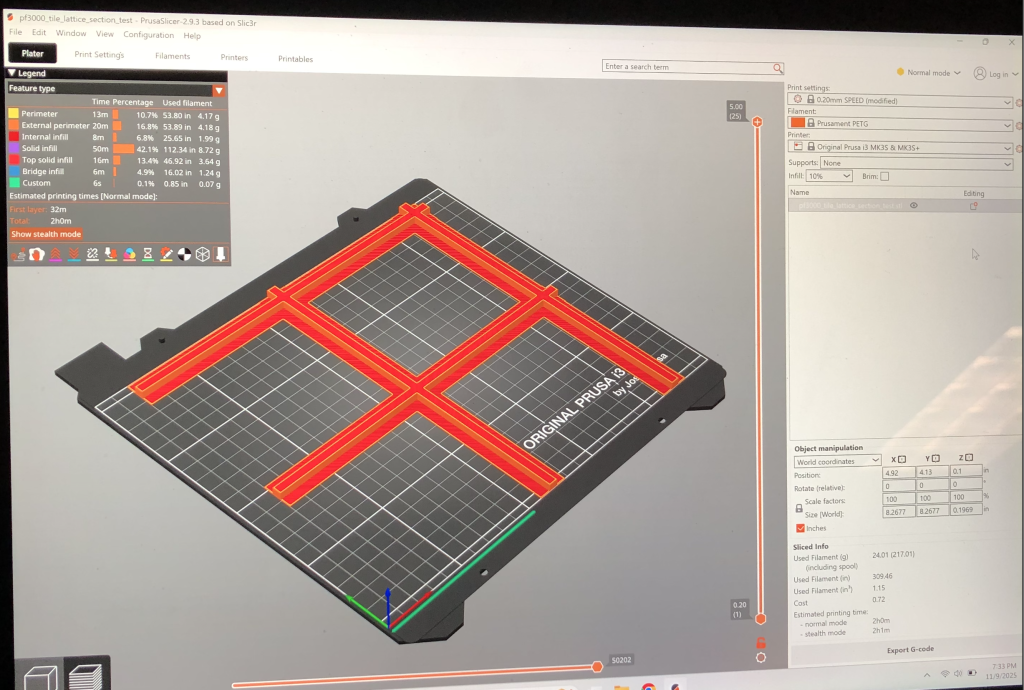
For the second prototype we added some legs with one fully enclosed pixel. The idea would be you’d kind of chain these pieces together. We liked this design because it was light on seams and also would work a little more easily than the original “plus” symbol design. Regarding what we mean by seam – basically the intersection of two of these pieces where they connect it creates a seam and you have to seal seams to prevent water intrusion. We printed a bunch of these for real and tried them out.
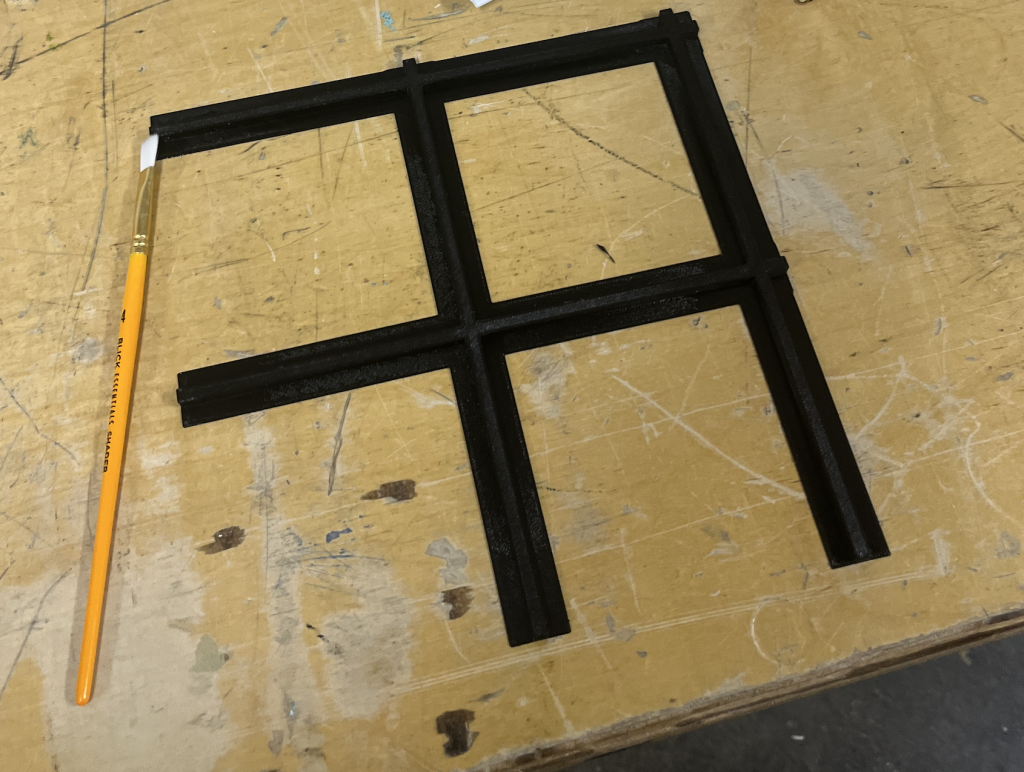
This design seemed like it might work so we did a more formal test. We needed to know a few things in order to know if we were on the right track:
- Will the material with printed with, PETg, work with capacitive touch?
- Can we glue it on in a way that prevents water from getting to the electronics?
A quick tangent, how did we get to using PETg for the 3d printing exactly? Well, its kind of what we had laying around so it seemed to be a good place to start. We researched it of course and it seemed to have the right properties, was good with UV and water and such. We’d end up doing a deeper dive on 3d printing materials later, but for now it seemed worth an experiment.
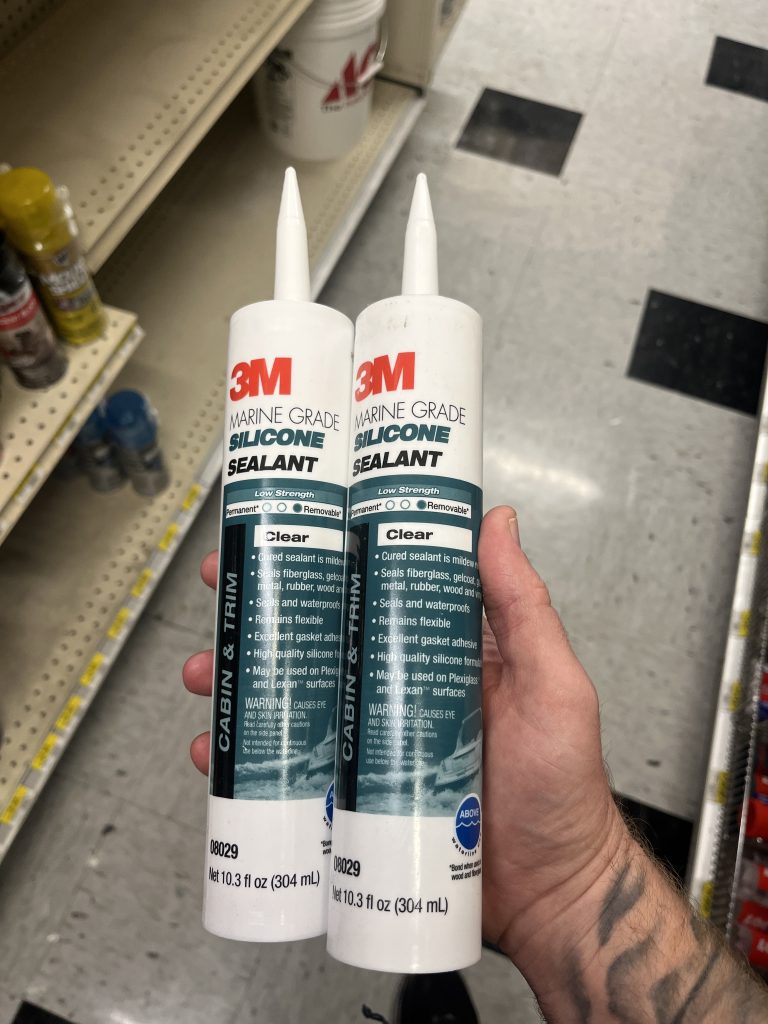
First we had to find a glue we thought would work. We needed a glue that was aesthetically pleasing but also not too intense cause we might need to remove it some day. And i mean, the glue needed to be waterproof and make a quality seal. Turns out boat people have such a glue, so we picked up some of it at the local hardware store:
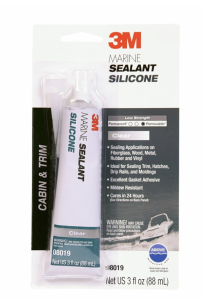
With that we were ready for a test. The idea was simple, glue the PETg print using the boat glue, pour water on it, and hopefully we didn’t ruin anything.
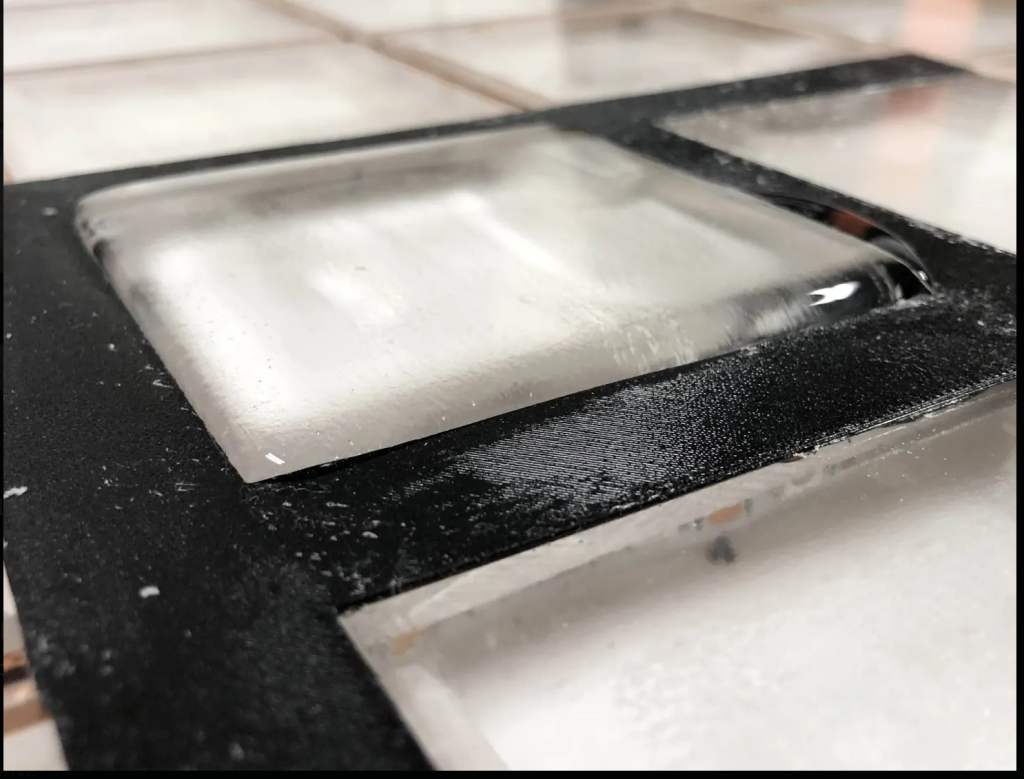
We glued, let the glue cure, and then we poured a little water on the piece. The water sat there for a couple days, it didn’t go anywhere. That’s a pretty good seal in our opinion. We cleaned up the water, turned on the PF3000 and hey, everything still worked, we were on the right track as this seemed like it would do well to keep the rain out.
As we played with this particular design we noticed some issues. For one, it was kind of hard for us to fit it across the entire art piece once we looked at covering all 256 pixels. For two, we had some special cases around the edges and this component didn’t work well for that (similar to an issue we mentioned in the original plus design). In addition, while this did have manageable seams, they lacked any kind of uniformity across the whole PF3000 which we also didn’t like; it just wasn’t as aesthetically pleasing as we would have liked. We decided to dive into the design one more time and see if we could solve the remainder of these issues. And we did.
One Lattice to rule them all
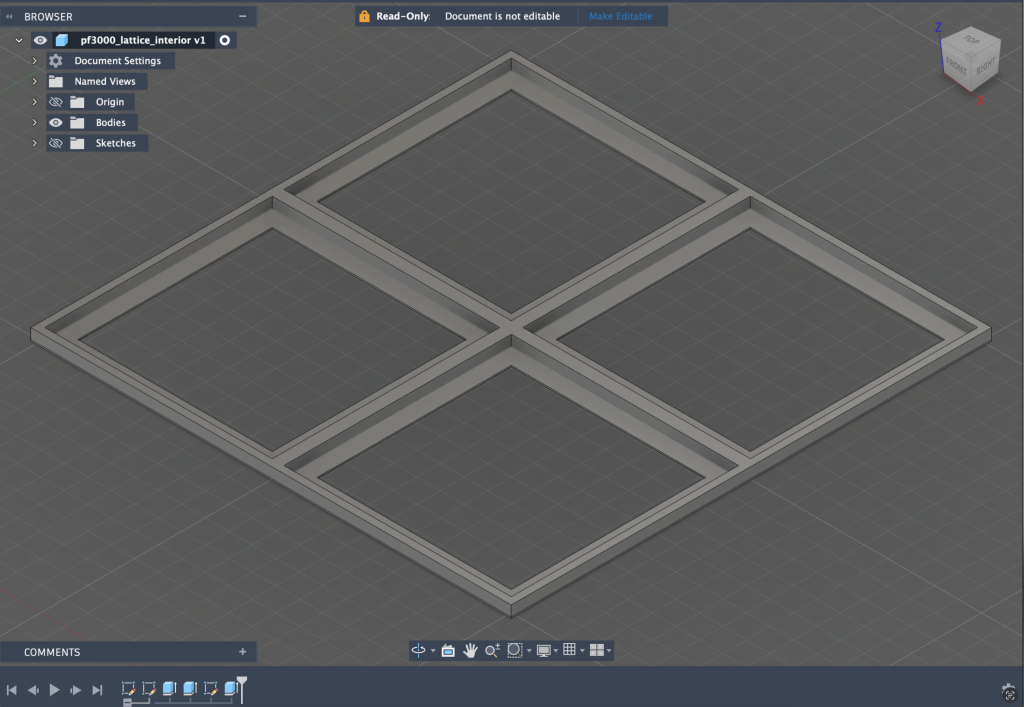
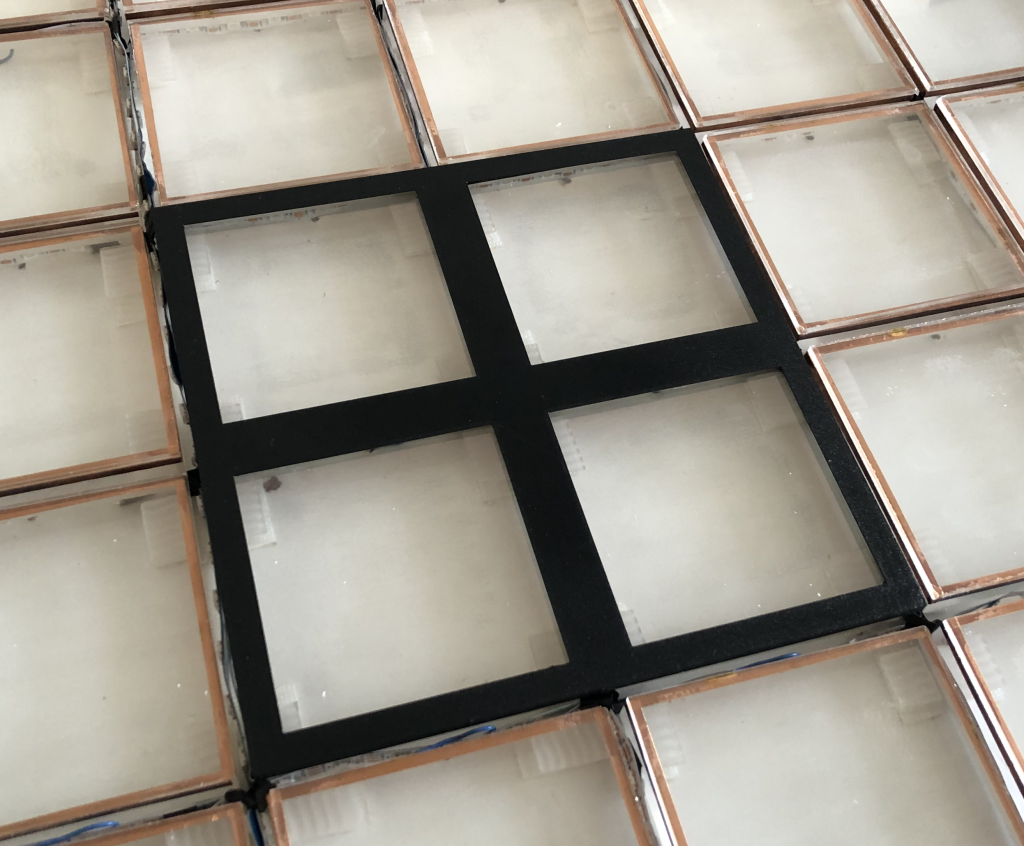
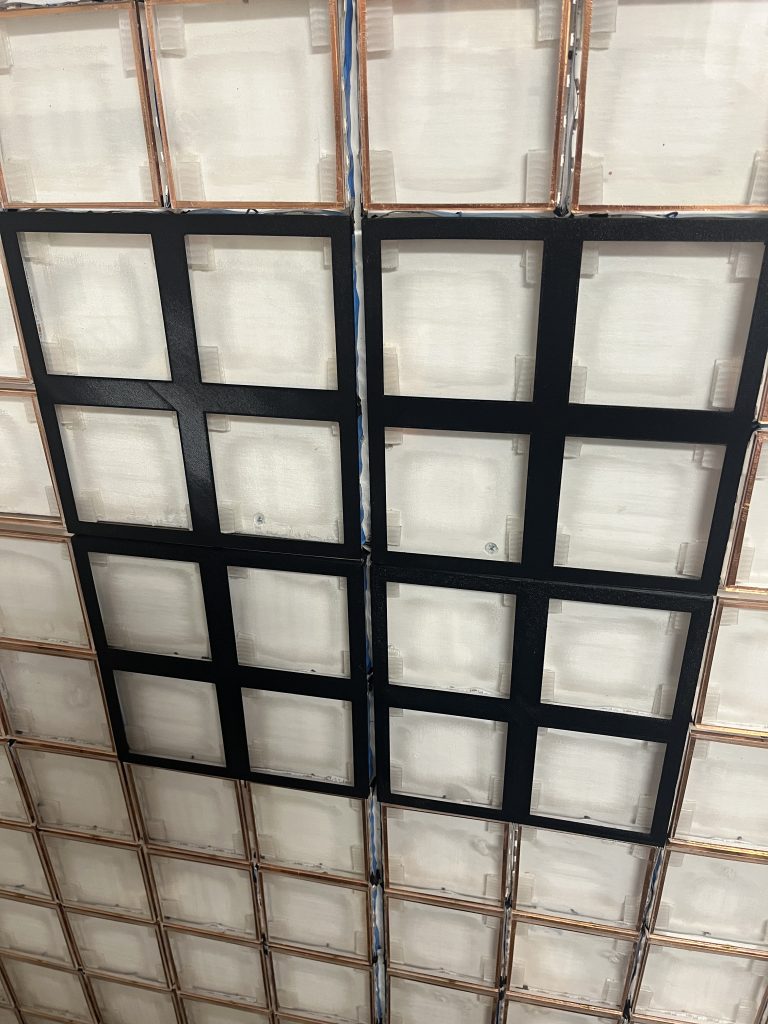
We decided we wanted something more uniform so that the PF3000 would look consistent across its surface. We also wanted a component we could more easily create variations of to handle the outer edges better. Our component designer eventually came up with the idea pictured above after a number of discussions with the team. It fits over 4 pixels at once and then each edge is a seam that aligns with the exact same piece. The outer perimeter of the component covers exactly half of an LED channel so when two of these pieces meet the entire channel is completely covered.
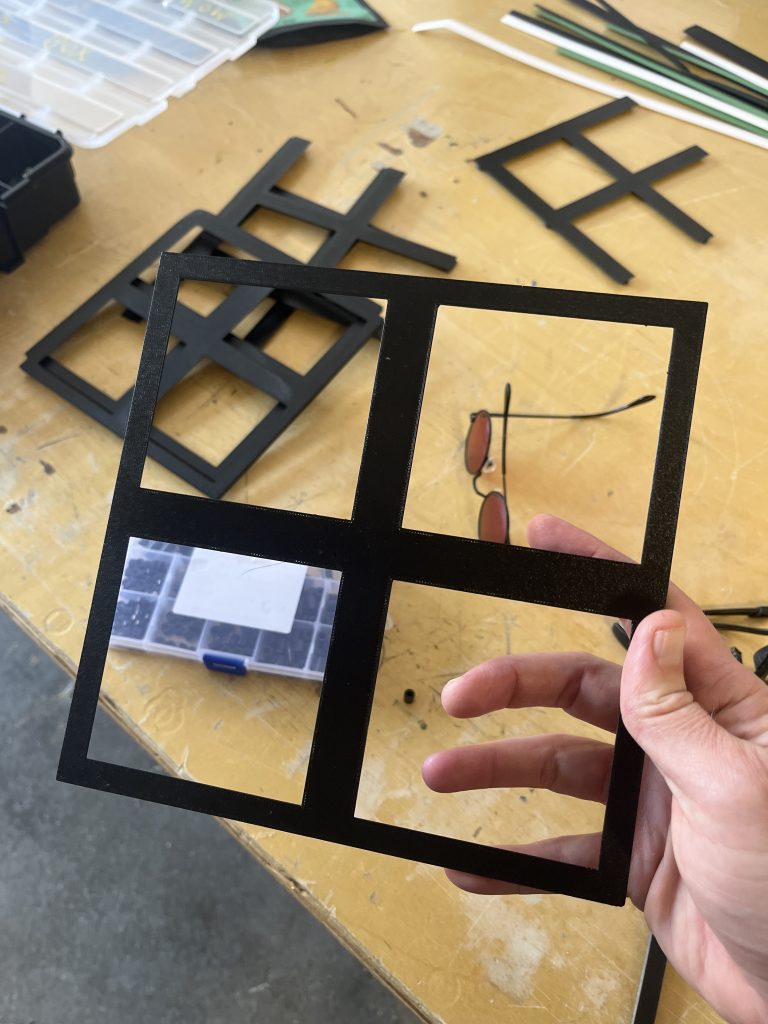
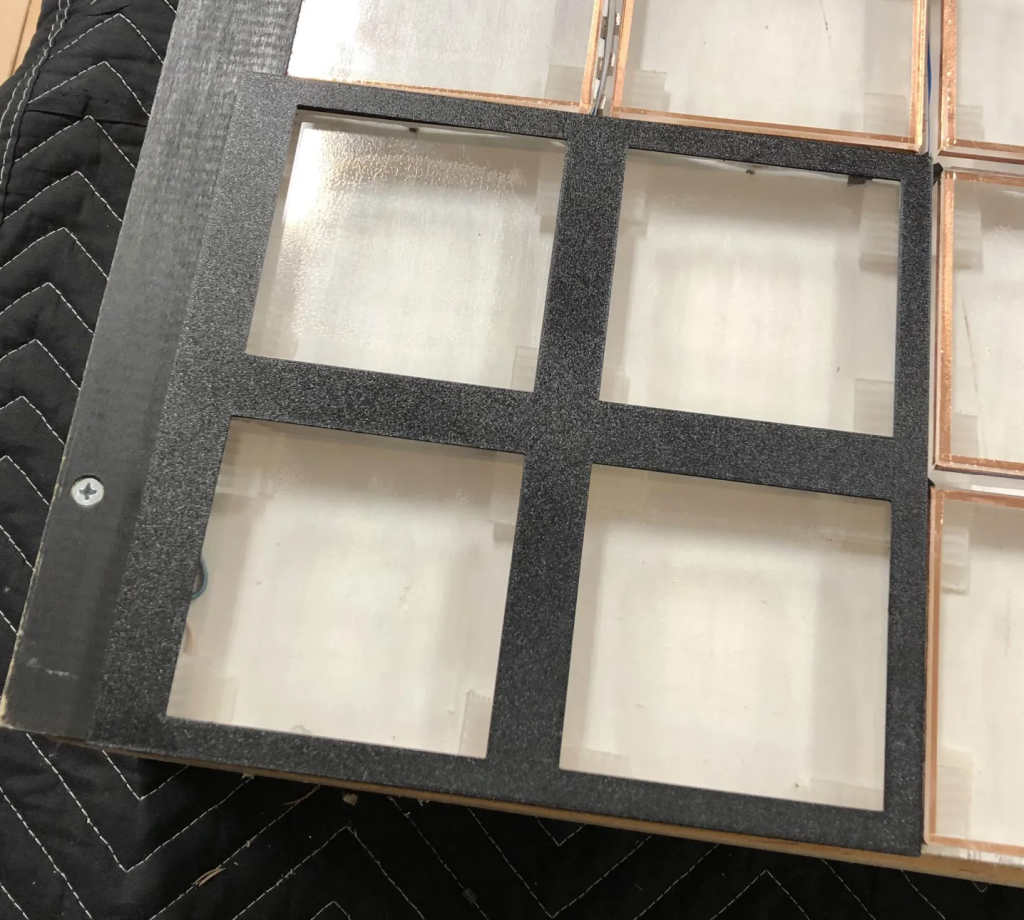
We created a variation of this for the outer perimeter of the PF3000. It has a flange (overhang) on one side that goes over the wooden perimeter of the PF3000 display.
Into Production
Estimating the Print
We have a design we know is going to work and everyone is feeling good about it, what next? Well we have to make all the pieces. Since each piece is 4 pixels and we have 256 pixels in total we just need a little math to figure out what we need so… 256 divided by 4… (getting out my slide rule rn fr) and that’s 64 lattice components. Okay, that’s all fine and good, but we just have one little hobby 3d printer. Hrm so how much work (aka time) is that?
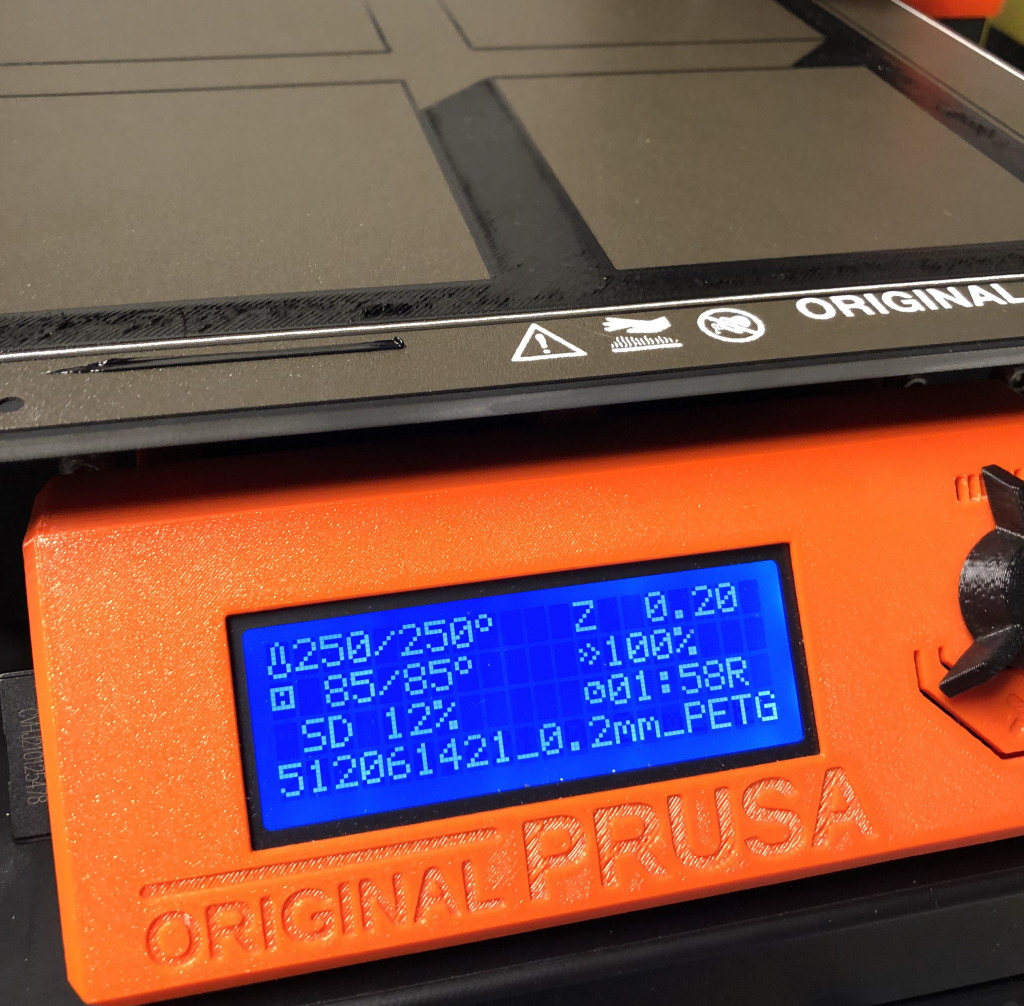
The best our printer could do is a part every 2 hours (and some change). If we do a little math again (getting out the slide rule) that’s 2 * 64 or about 128 hours of printing. Now here’s the thing, that’s 2 hours of 3d printing if everything goes right. Things don’t always go right though, in fact, in the world of 3d printing, things go wrong, a lot. Check out these next two images of failed prints if you don’t believe me.
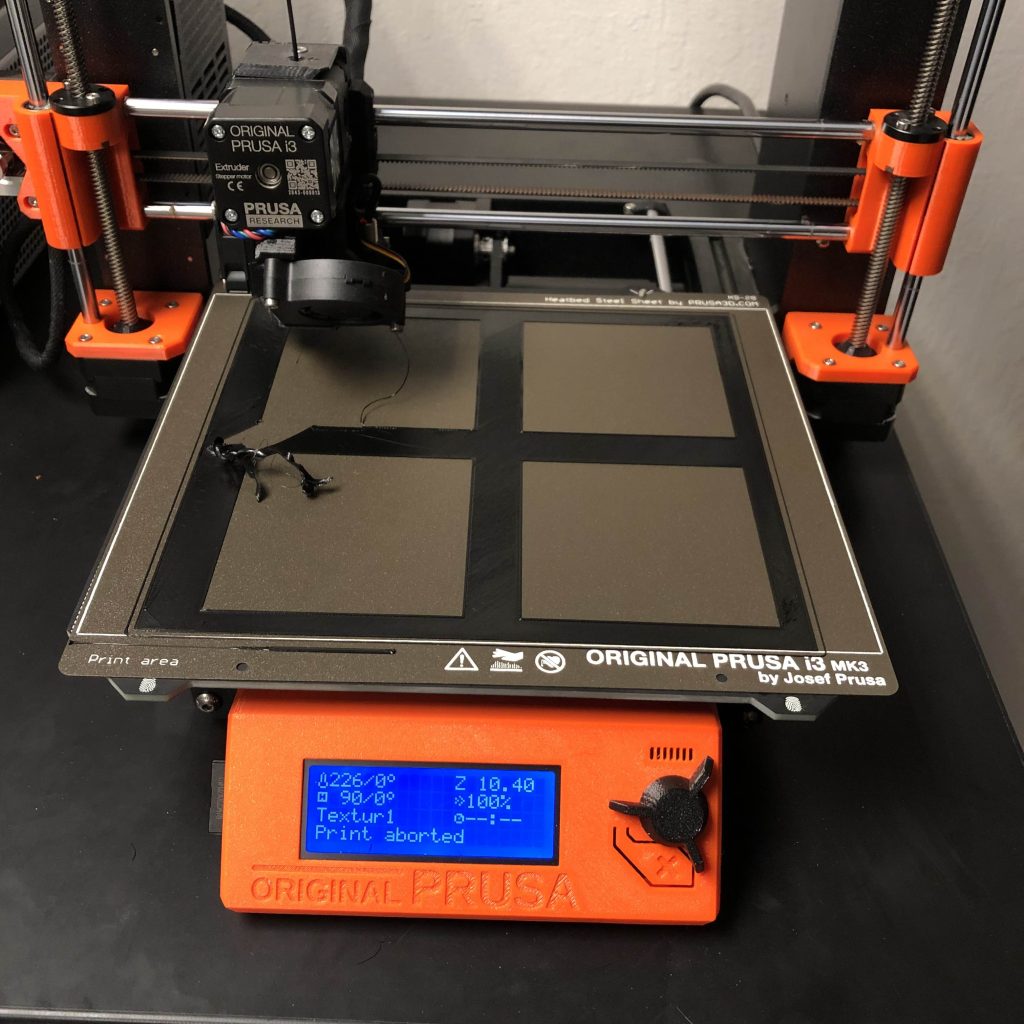
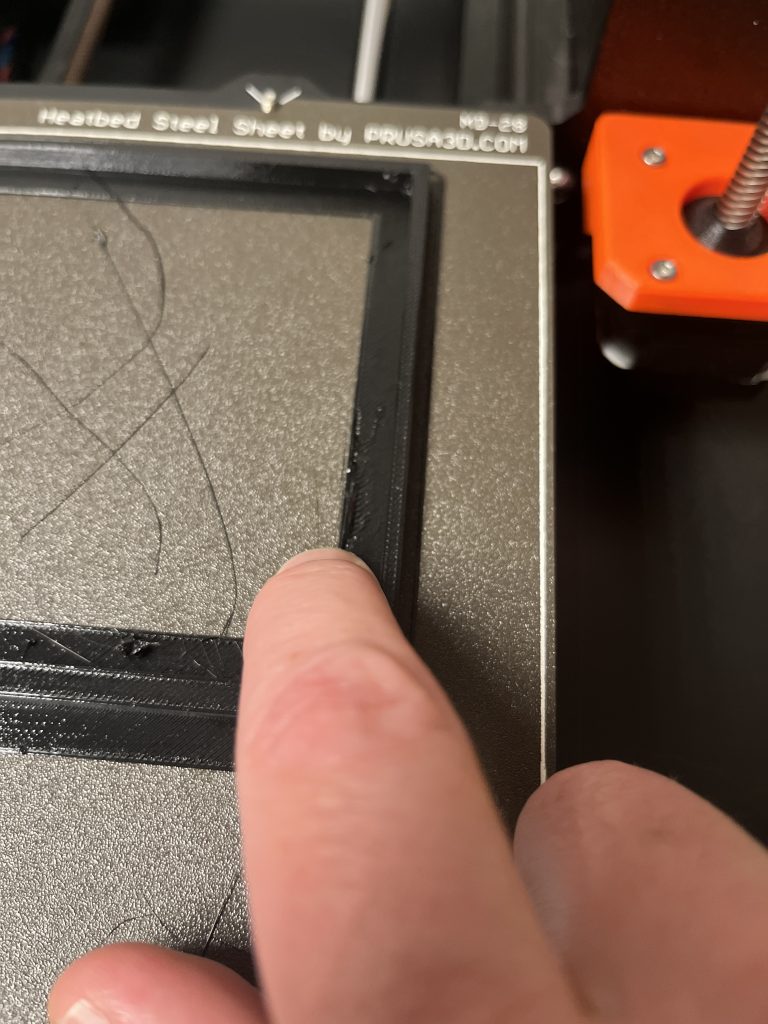
This leaves 128 hours plus time to experiment with settings, have misprints, try again, rinse repeat, agonize, hope, sleep, and do it all over again until we get it right. In other words, this is going to take way more than 128 hours and well, people have day jobs you know? I think we’re going to need some help.
Tapping the Collective – Jordan the 3d printer expert
After we assessed how long things were going to take we knew we weren’t going to make our deadlines unless we got a little help. We started thinking about our options. First we looked into professional 3d printing houses. With these houses you send them your design, you have all kinds of choices over materials and different 3d printing technologies, and after all that, you can get a quote. While this is pretty great in some regards, you can literally make any part you want, its also a bit overwhelming in terms of choice. I mean, I’m no 3d printer expert myself and I was swimming in documentation learning about all the different ways you can 3d print parts. Its pretty incredible. That said, its also pretty expensive, like thousands of dollars to make the parts we were going to need with no way to iterate if we made a mistake. And so as it goes in art, we needed to think of another way to get the help we need.
Now our team has been around for a while and this has provided us a few opportunities to meet fantastic creators around the Bay Area. Back when we operated our warehouse in Richmond, CA one of the folks that shared the studio with us was this guy Jordan. If there’s there’s one thing you’ll learn about Jordan quickly after meeting him is that this guy is passionate about 3d printing, like passionate. As we were tossing around names and places where we might go for help Jordan’s name came up and we thought, yea, this could be our guy, if he’s interested he’ll definitely be able to get the job done. So we reached out. To paraphrase Jordan’s response, 3d printing? This is what I do. The match was made, we found our help – Jordan would help 3d print the parts we need. He’d also be able to advise us on 3d printing best practices, materials choices, and just help us navigate the giant pile of option that lay before us in this foreign 3d printing space.
For about two weeks we had lots of discussions late into the night. Jordan happens to have a collection of 3d printers in his house and experiencing using different kinds of materials. We were able to show him our CAD designs and talk about the different requirements we’d have due to the Napa Lighted Arts festival. Lucky for us he confirmed that our choice of PETg was the right material for an outdoor art piece. We also discussed the merits of the different printers he had and how they might affect the time frame. Each printer was different, they had different calibration complexities, and they also printed at different speeds. Some were better at small components, some were better at large. There were still a lot of options, though now we had a guide which really helped us navigate all the options.
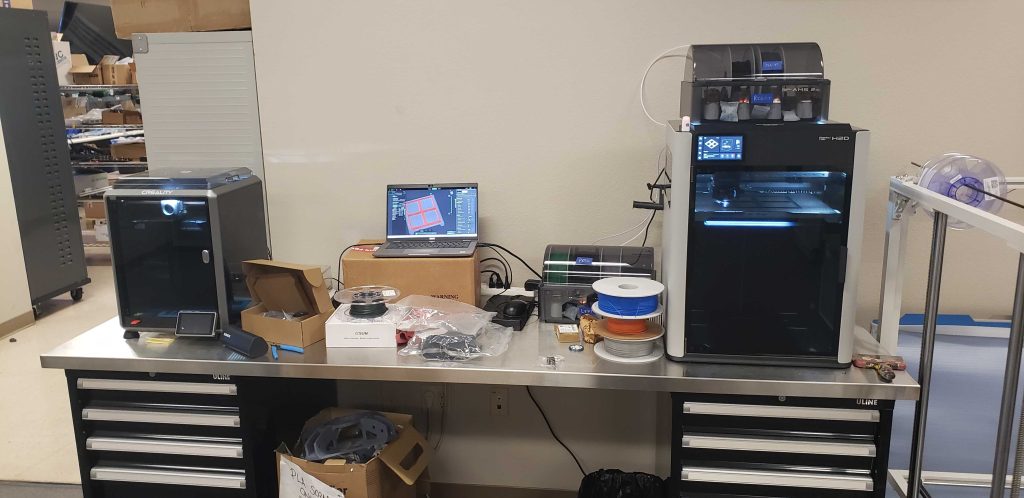
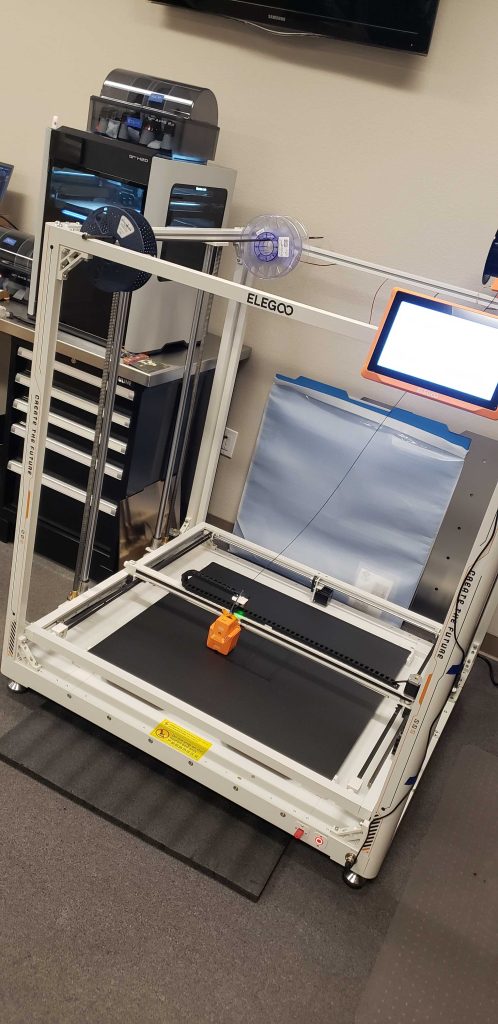
What is PETg exatctly? Tl;dr its a kind of plastic that is pretty good when left out in the sun and as far as plastics goes, is less toxic to print, and good with water. There’s more to it of course but of the 3d printable options this was truly the best choice. We recommend googling around if you’re interested in this stuff, you can read about the PET family of plastics via the wikipedia too.
Once we settled on the material and 3d technology Jordan got to work. There’s a large effort that has to take place when getting a 3d print job like this started. Jordan would do print after print in his personal 3d printing lab working through various issues, calibrating the printers and updating the design so that it would print well. There’s all kinds of settings to explore and for a robust component that will hold up to weather, it really takes both experience and some experimentation to get it right. Probably for another 2 weeks Jordan explored the best way to print our lattice. He made several demo pieces for us and brought it in so we could see how the different printer settings would impact the lattice components.
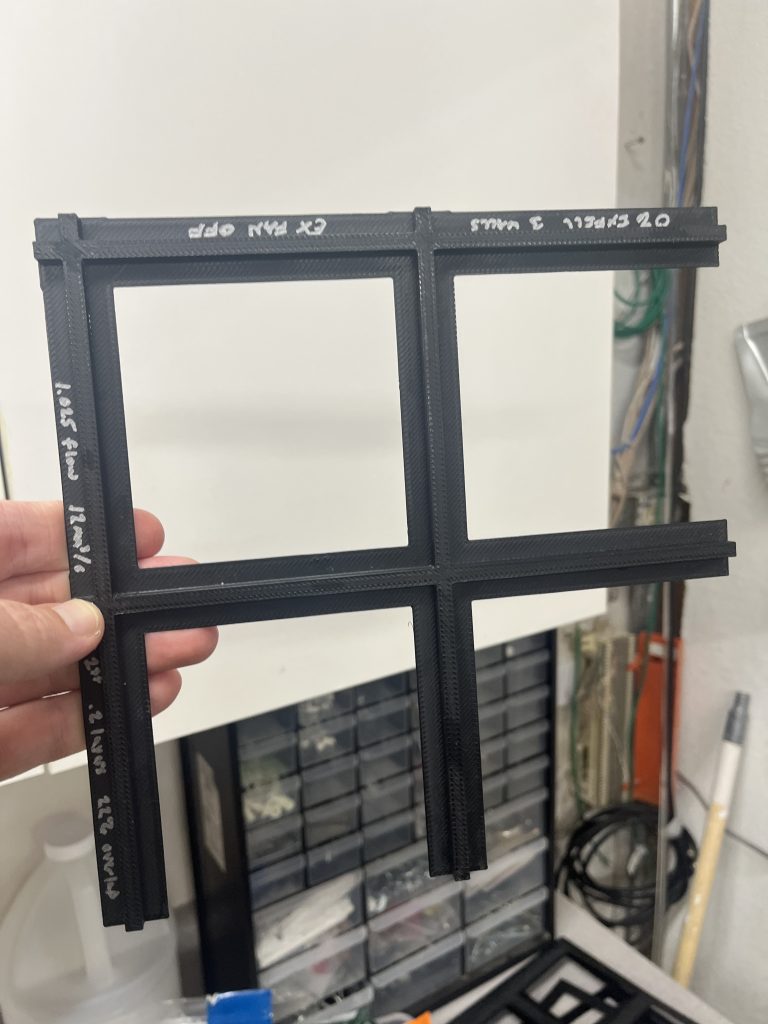
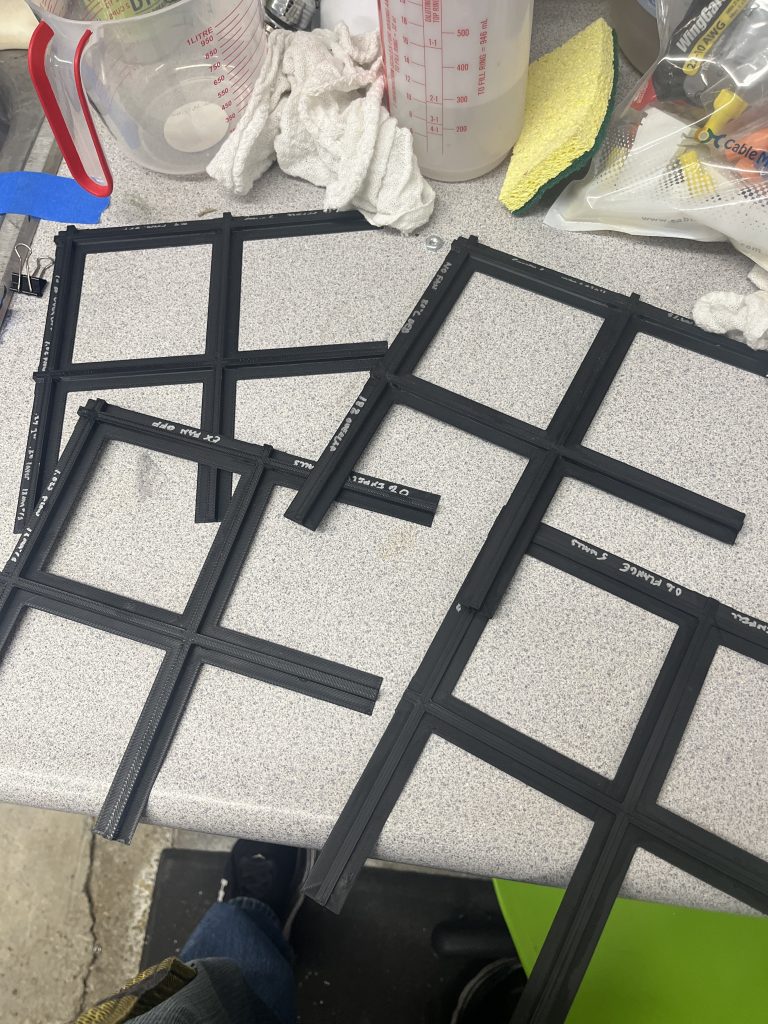
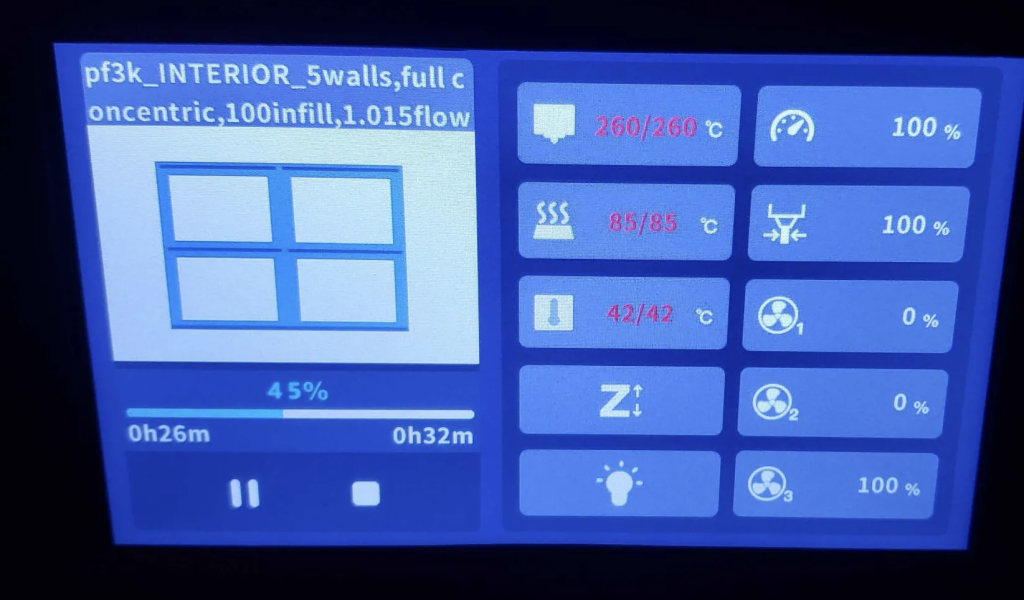
Eventually we commenced printing the full set of 64 pieces. Even with all his experience, Jordan still had to navigate all kinds of misprints. Truly a labor of love, Jordan kept at it and used his keen eye for printing to ensure we were getting the quality pieces we would need for the PF3000.
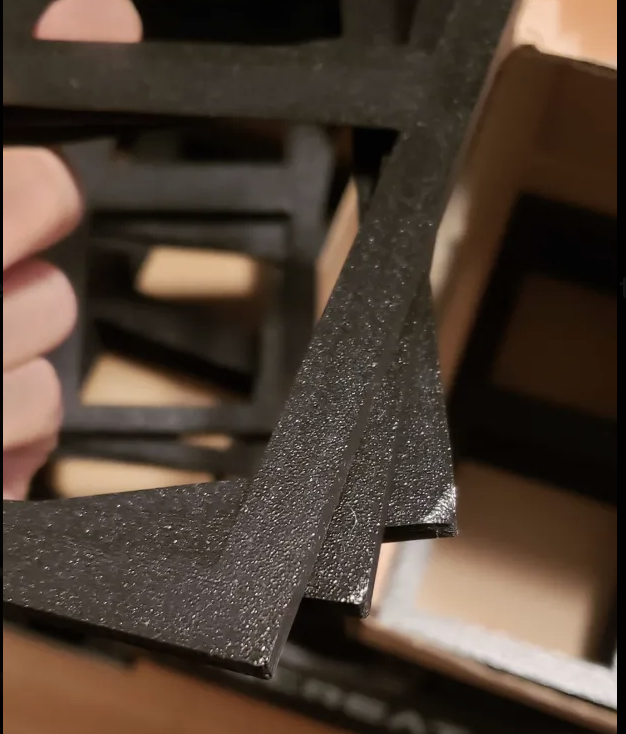
Jordan kept grinding on this build. 64 may not seem like a lot of components if you’re used to giant factories pumping out parts. The thing is, giant factories are built by large teams with lots of money to do one thing really really well. For small operations like ours we have to do a lot of work to get things just right. Here’s some more shots from the print in Jordan’s lab.
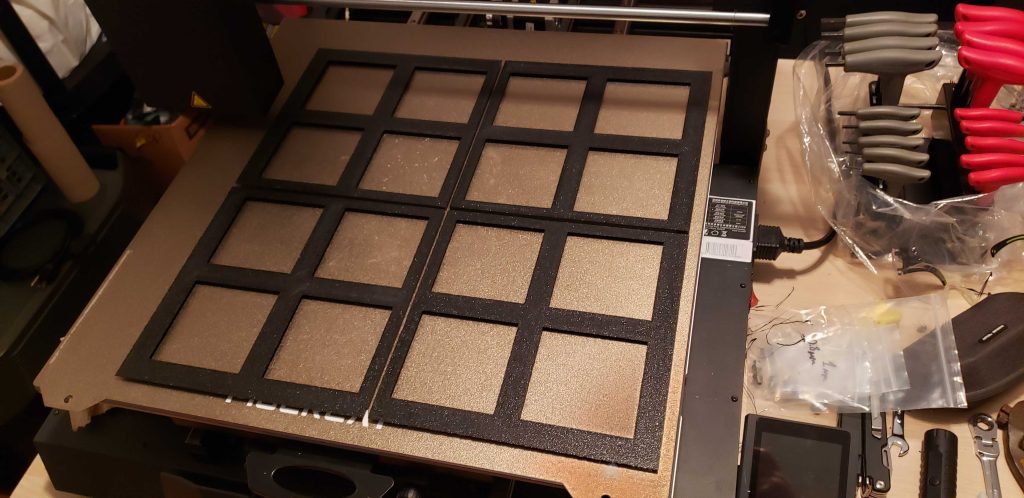
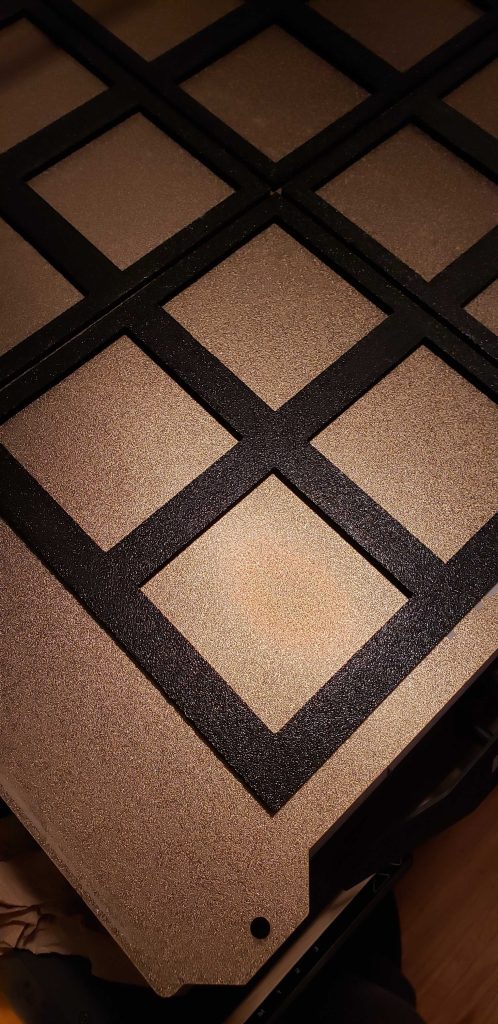
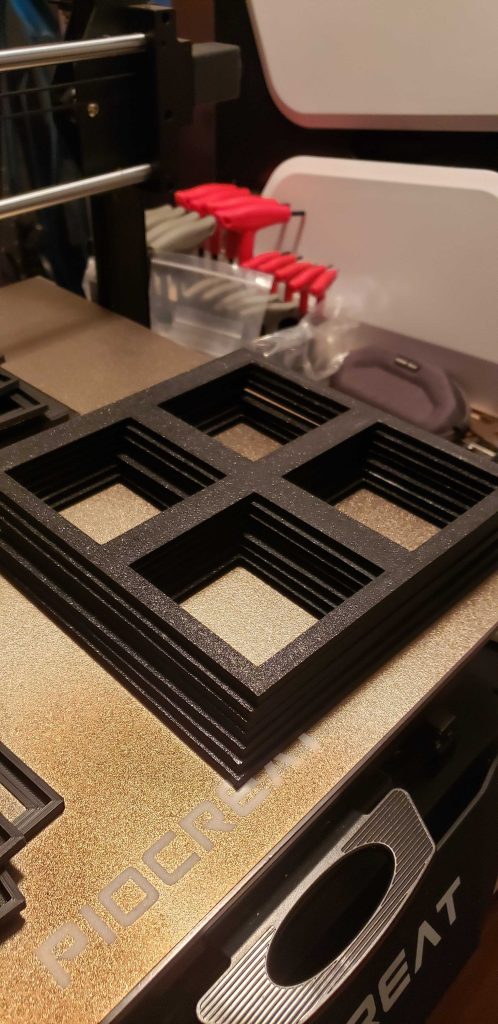
We kept at it, tweaking and adjusting, working through the misprints, and eventually we got all 64 pieces done and ready to go.
Installation – Driving toward the finish line
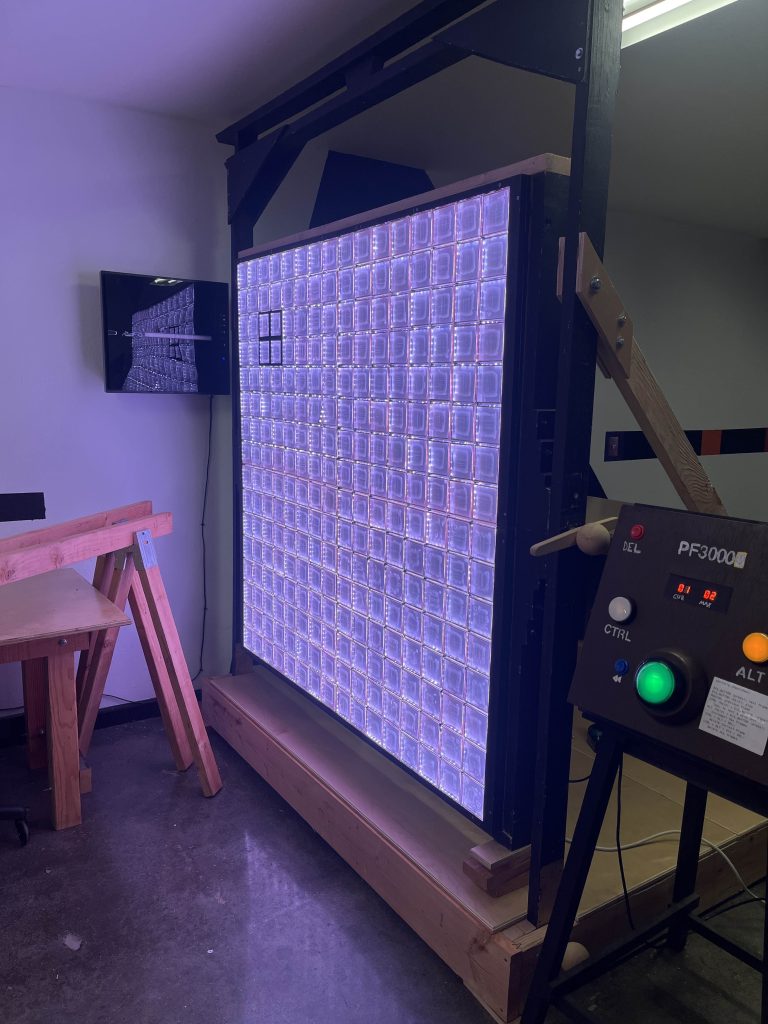
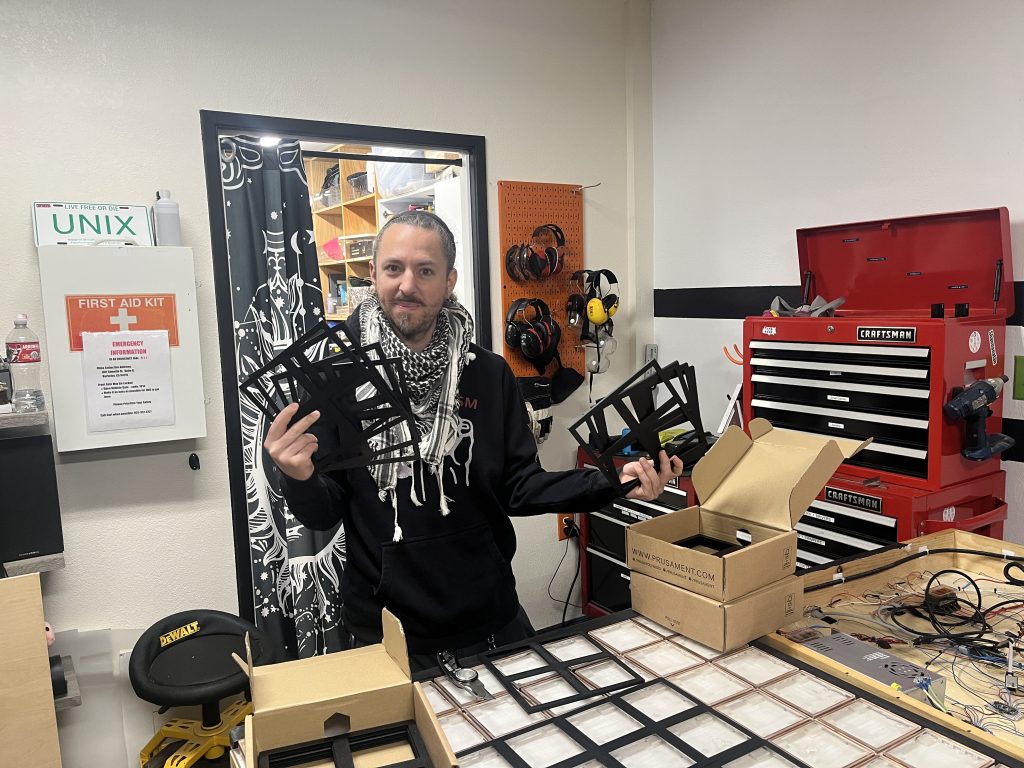
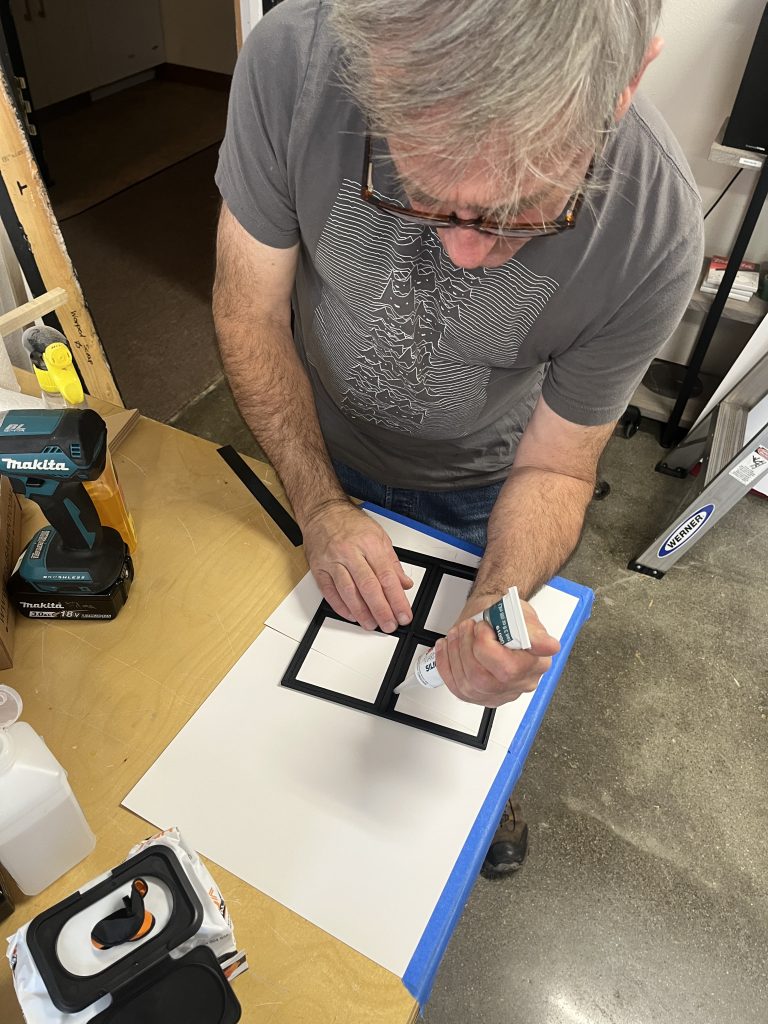
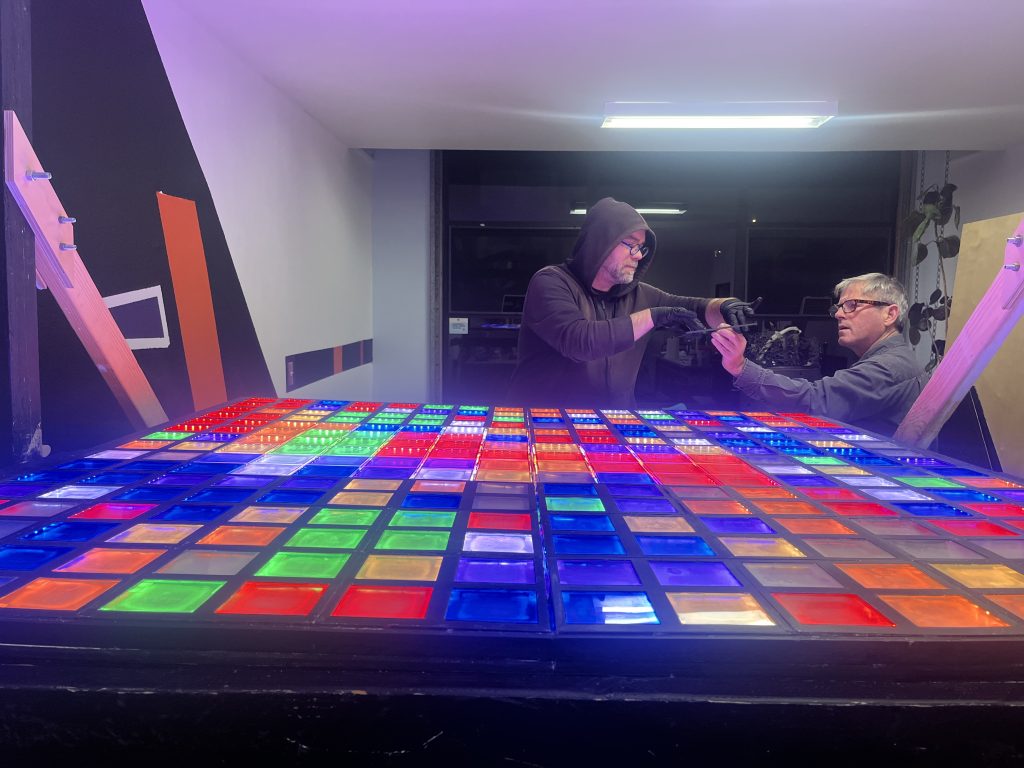
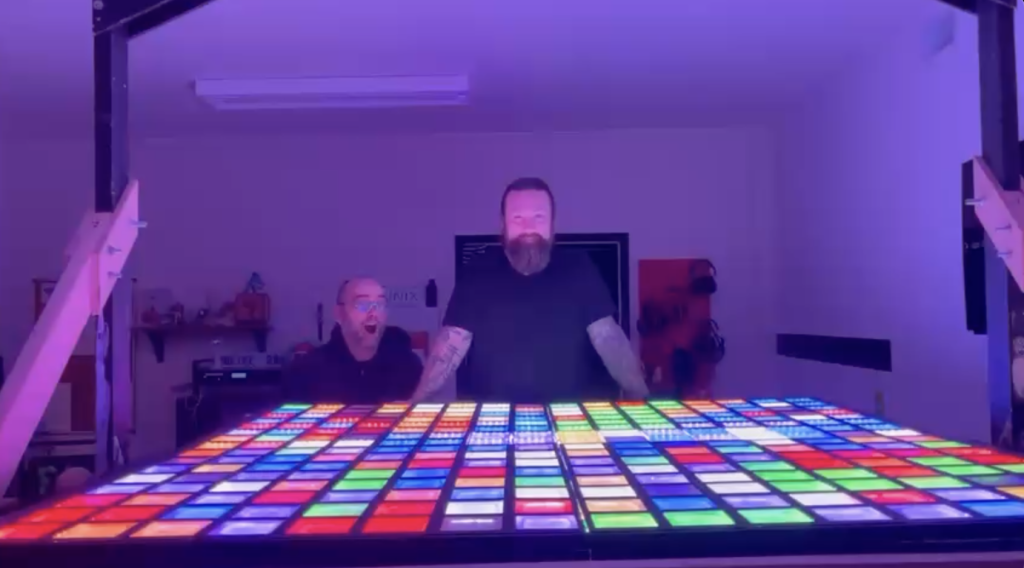
We have the parts, we have the glue, we’ve tested everything… now for the last piece of this part of the journey, the installation. We have to take all 64 lattice pieces and semi-permanently affix them to the PF3000. This is no small task as it took a team of 3 talented artists around 20 hours over a weekend to get it all done.
And let me tell you, as one of those artists, this part had some serious challenges that we didn’t foresee. We had pixels completely stop working about 8 times and had to diagnose them all as we went. We also had to re-solder some of the pixels because the lattice was too tight and snapped off some of our wires (oopsie). One of my favorite (and most stressful) issues was we found there was a small bow in the display when the display was rotated horizontal (aka maintenance mode) that was compacting the middle making it difficult to install the lattice pieces in those locations. I know, i’m kinda glossing over all these challenges, but if you want to hear more buy me a coffee some time and I’ll talk your ear off.
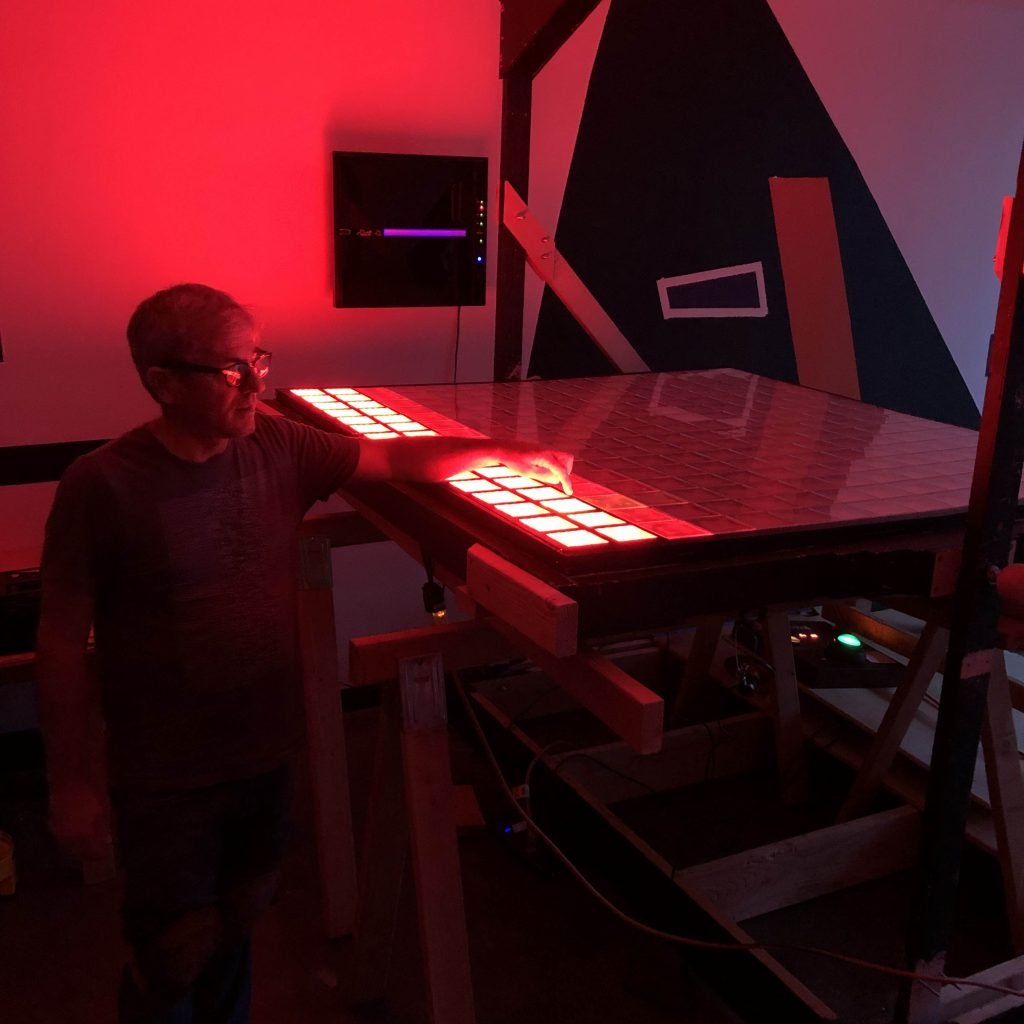
As for the rest, well, you’ve all read so much of this article, so how about I just show you some pictures of the installation. You all definitely deserve some pictures if you made it this far.
Closure
We started planning the lattice in September 2025 and just finished the installation this morning, which is January 4th, 2026. We probably started working on our own designs in November and our collaboration with began Jordan around thanksgiving. This part of the PF3000 version 2 project was an absolute haul (a saying we use when something is a ton of work cause it really was). There were challenges for us at every turn, there really were, heck we even had our credit card stolen (yeesh!). But we kept at it, kept grinding, used our heads letting passion drive us. We had a team of fantastic engineers working on the lattice; I knew it was only a matter of time until we succeeded. Also, I want to point out that no one person knew all the answers, this was truly a collective effort; we never would have made it without the strength of our diversity.
And now we have a fantastic waterproof display that we can share with the Napa Lighted Arts Festival… rain or shine.
See you soon for Part 4… yep, we’re still not done telling stories.